Sunday, 22 May 2016

Instagram Update

 Hello everyone! It's been a long time since I have done a ManiMonday but here we are.


If you couldn't tell already, this manicure is inspired by the new Instagram update that happened last week.


It has been a little controversial, some people comparing it to Windows Power Point programme where you could ombre the backgrounds, however after a few days of getting used to it, I think I like it.

I did this as a manicure as I thought the colours were perfect for getting us into the mood for the summer evening we have been starting to get.


For this manicure, I had to give it a few tries before I got it right. In the end, the winning solution was to start with a white base, then using the right angle of a sponge, painting on a half rainbow of colours and then sponging like that.

The colours I used were:
Lemon - Barry M
Speed Dial - Ciate
Scorchin' Hot - Seche
Purple Burst - Jessica (Neon collection)


Although the actual logo has hints of pink and blue, I found my purple was quite pinky, and the blue just darkened the whole look and didn't make it look as nice.

What do you think of the new Instagram? and on that note... don't forget to follow me at whatalooker

Thursday, 5 May 2016

Turning Myself into Snapchat Filters


I will be the first one to admit that I have arrived so late to the Snapchat party it's unreal! Having only just got it back after a failed first try, my friend pointed out that I have missed out on 13 months of amazing snap chat stories from my travels. Besides the wasted opportunity to brag, I have found myself opening Snapchat excitedly every day to see what new filters it has in store for that day.
If you follow me (stephlooker) then you will tend to just usually see me trying on every single filter and having a giggle to myself.
One particular favourite of mine is this bejeweled beauty.


One thing I love about these filters is that you can be sat there with no makeup on and look fantastic because the makeup looks fairly realistic!
This diamond eyes look got my creative juices flowing and I thought as festival season is coming up, this would be a great look to wear when you don't have concealer to hand to cover up those 3-days-of-no-sleep dark circles.

For my look, I did put makeup on underneath just to replicate the dark eyes, pink cheeks and lips. I used all the products below, and used eyelash glue as the adhesive to attach the little gems I had. I was given these as a gift so can't say where they are from but if you go onto any nail art suppliers, costume or craft shops, I'm sure you could find them there.


I made the mistake of wearing skin makeup when I recreated this look which made the gems and glue harder to stick to my face. This is another reason why this look would be great at a festival as you just need clean bare skin for it to last.

Using tweezers, I picked up the gems and made a vague triangle outline over the area I wanted the gems, and then I filled it in using green, white, yellow and purple gems.


Although the gems in the filter are slightly chunkier, these lasted for ages and have a more delicate look.

I wore my Clinique chubby stick in watermelon and then really rosey'd up my cheeks and this is the finished look!


I can see myself doing more Snapchat filter looks in the future so let me know if you have any suggestions! There is also the pop art tear look that reminds me of a look a did a while ago now.


 To read all about how I did that look, click here

Tuesday, 3 May 2016

Caudalie Vinosource Skincare


As you may know by now, I am a big fan of French brand Caudalie. In the past I have blogged about the various body care products as well as other skin care ranges, however I have noticed that the Vinosource has been popping up a lot on different social media platforms recently which I think is down to the recent repackaging of the Vinosource range which looks beautiful. I still have the old packaging unfortunately as I think the new ombre pinks for the range look so sweet and would look amazing as a collection on your beauty table.
I have written about this range before but I thought I would do a little updated version.

The Vinosource range is for dehydrated skin. Its Polyphenols are the most powerful antioxidants in the world, and the grape water is instantly hydrating. The scent is sweet and the products are light, perfect now we are coming into summer and the weather is heating up.


I have used a majority of the products from the range, excluding the moistirsing midnight recovery oil which retails at £26.00 is on my wish list!

The 'S.O.S Thirst Quenching Serum' is designed to go right down to the deeper layers of skin, and to hydrate them so they're healthy and plump for when they reach the skins surface. This serum absorbs so quickly and leaves your skin feeling really soft, and a perfect, plump base for your moisturiser and makeup. The serum is only £29.00 which is amazing value for such a beautiful product.

The 'Moisturising Sorbet' which retails at  £23.00, has calming chamomile, and again, absorbs really quickly into the skin. The smell is beautiful and a little goes a long way. I love that it is called a sorbet, as it makes you think of a mouth watering exotic dessert in the summer. Saying this, the sorbet is perfect for me during the summer but I find in the winter I prefer something thicker. This is where the option of the 'Moisture Recovery Cream' from the range would do a better job, and even the 'Intense Moisture Rescue Cream' for particularly dry skin.


To really complete the collection, I have also been using the 'S.O.S Morning Eye Rescue', which is a beautifully light and cooling eye cream that hydrates the delicate skin under the eye. Again, the smell of this is lovely, and the light consistency doesn't block the pores under your eyes, and leaves you feeling refreshed and ready for your day. As it's hydrating, it also plumps the skin and reduces the look of dark circles.

If you are wanting to try a natural skincare range then my first suggestion would always be Caudalie. It is such a beautiful brand and every single product excites me.

Tuesday, 26 April 2016

The Power Of Makeup Tag


Hello everyone! As you may have seen via social media, I am back from my travels and am ready to get stuck back into blogging. From now on you can expect to see tidy hair, a full face of makeup and a lot more regular nail art!

'The Power Of Makeup' is a tag I have seen lots of big bloggers posting recently. This tag is NOT to highlight how much girls need makeup or to shame girls when they don't have makeup on, but just to show what makeup can do, and how it can enhance your natural features.

I thought this would be an appropriate tag for me to explore as whilst on my travels I can only count a handful of times I wore makeup, so I am really used to my bare faced look. As I'm not someone who wears a lot of heavy makeup, this probably won't be as dramatic as it could be, but I think it is fair to say you can definitely see a difference!


As I'm doing this to just enhance my features, I have kept the makeup look fairly simple and natural, as going overboard would slightly defeat the point! I applied my makeup as something that I would wear on a day to day basis.

I'll leave to links to any products I have reviewed before in case you want to read more!


So to start, I used my YSL Fusion Ink foundation to just even out my patchy skin tone. As I'm just about clinging on to the last bit of tan I got from being away, I'm a couple of shades darker than I usually am so am using a little sample pot as my usual is too light now.

I then used my Rimmel wake me up concealer which has a very light shimmer, so is great to cover and brighten to cover up dark circles and any blemishes. I have quite a few hormonal spots on my chin at the moment that can get quite dry, so I made sure I used my Origins Ginzing moisturiser before applying my makeup, as its really hydrating, but the Ginzing really wakes up my skin due to the coffee extract, so adds a little radiance to the skin.

I then used my beauty blender to blend that all out. I don't wear a huge amount of foundation so it hasn't changed my bare face too much, just made my complexion more even.

Next, I used my bare minerals 'warmth' as a bronzer to go around my forehead. As I tend to tan more there, I needed to blend that into my foundation to get the natural glow. I also used it to slightly contour under my cheek bones.

To finish off, I used my Topshop cream blush in 'Head over heels' which is a lovely peachy colour. As I'm fair skinned, I find bronzer doesn't warm me up enough, and need some cooler tones in the mix, so a bit of blush on the apples of the cheeks really brightens me up.


Next is the eyes which I think is fair to say, makes a big difference on my face.
As I am naturally blond, my eyelashes and eyebrows are practically non existent without makeup, so I tend to spend a bit more time on them.

From all these pictures I think we can safely say my eyes are REALLY wonky. I've noticed it before but this post has just confirmed it!

However, I used nude colours for my eyeshadow using my Barry M cheap alternative of the Naked 3 palette. I started by using a slightly shimmered nude, and then a dark brown for the crease. I really like a cut crease makeup look so use that quite regularly whether its dramatic or not.

I then use a cat flick liquid liner which makes such a huge difference for me. It doubles the size of me eyes and makes my lashes appear thicker at the root, so I am guilty of being a little heavy handed with liner!
I also use Benefit to define, fill in and darken my brows, which is something I really want to improve on as I am not the best!

Finally I used my Estee Lauder sumptuous infinite mascara which I forgot how much I LOVED. I haven't done a review on it yet which shocks me because it is lovely. It really does give a good balance of length and volume which is hard to find in one mascara. Having been away for so long, I am coming back and using all these products I forgot I had so it's like they are brand new again which is exciting!


To finish everything of, I used a lick of Kylie Jenner inspired lipstick by Mac in 'Brave' and brushed and lightly curled one side of my hair.

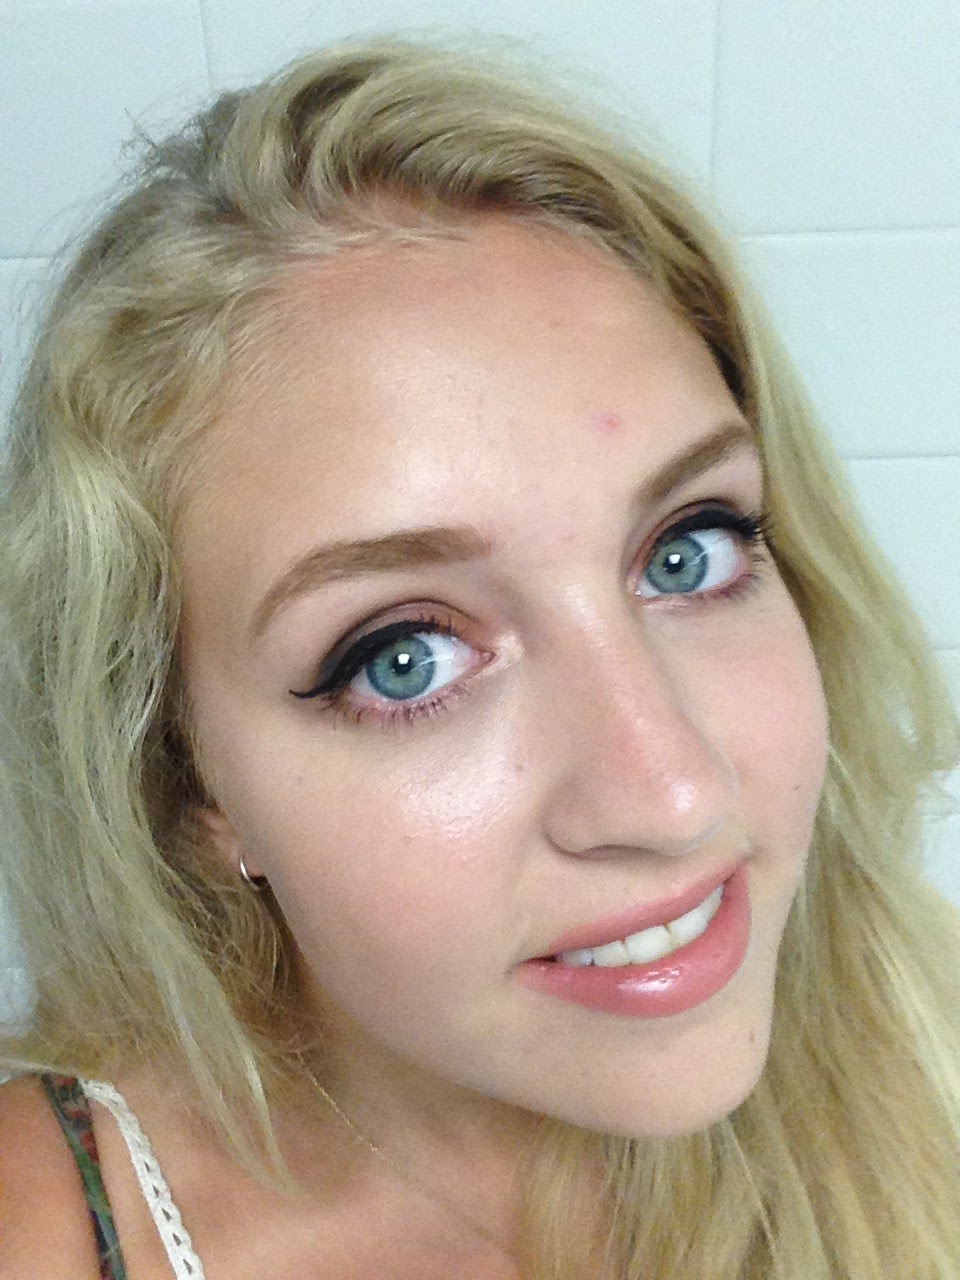
And here is the finished effect!


Is there any part of your makeup routine you know are vital for your features benefit from? Are you happy to be bare faced? I'd love to know what you think so please leave comments below!

Thanks for reading!

Sunday, 20 March 2016

Mermaid Nails


Todays nail art is actually some I am really happy with as I took a fairly long time doing them and I feel I worked hard for them! I also did BOTH hands (I usually have two different designs on my hands) which is a pretty big thing for me!

It all stems from the Sally Hansen polish, 'Making Waves' that I was gifted a few months back. Usually I am not a fan of metallic colours as I feel they can look a bit tacky sometimes, but when I tried the polish on for the first time the other day all I could think about was mermaids.

The aquatic blue shimmer it gives is actually really pretty, so I decided to do some underwater themed nails.


I did my left hand first as I am right handed, and slowly did the scales on every other finger. I then outlined in white the starfish and the shell, then outlined them in black to make them more prominent.
The shell in particular was really hard as I wanted it to be really neat.


My right hand was a whole new struggle, as using nail pens with my left hand gives me immense hand cramp after a while, so I need occasional bursts of stretching and moaning to my boyfriend.

The jellyfish was fairly simple however trying to get a perfectly round circle for the pearl was hard work! I added some white detailing to the pearl as I thought black would make it look like a cartoon bubble.


After that, I used a whitey/pink irredesant colour from H&M, over the top of the whole design, to give it another shimmery effect, which looks much better in real life I have to say!
It makes a really pretty colour on top of the blue, and adds that extra mermaid feel to it.


These here are the products I used! Hope you enjoyed


Wednesday, 9 March 2016

Australia Red Center Inspired Nails

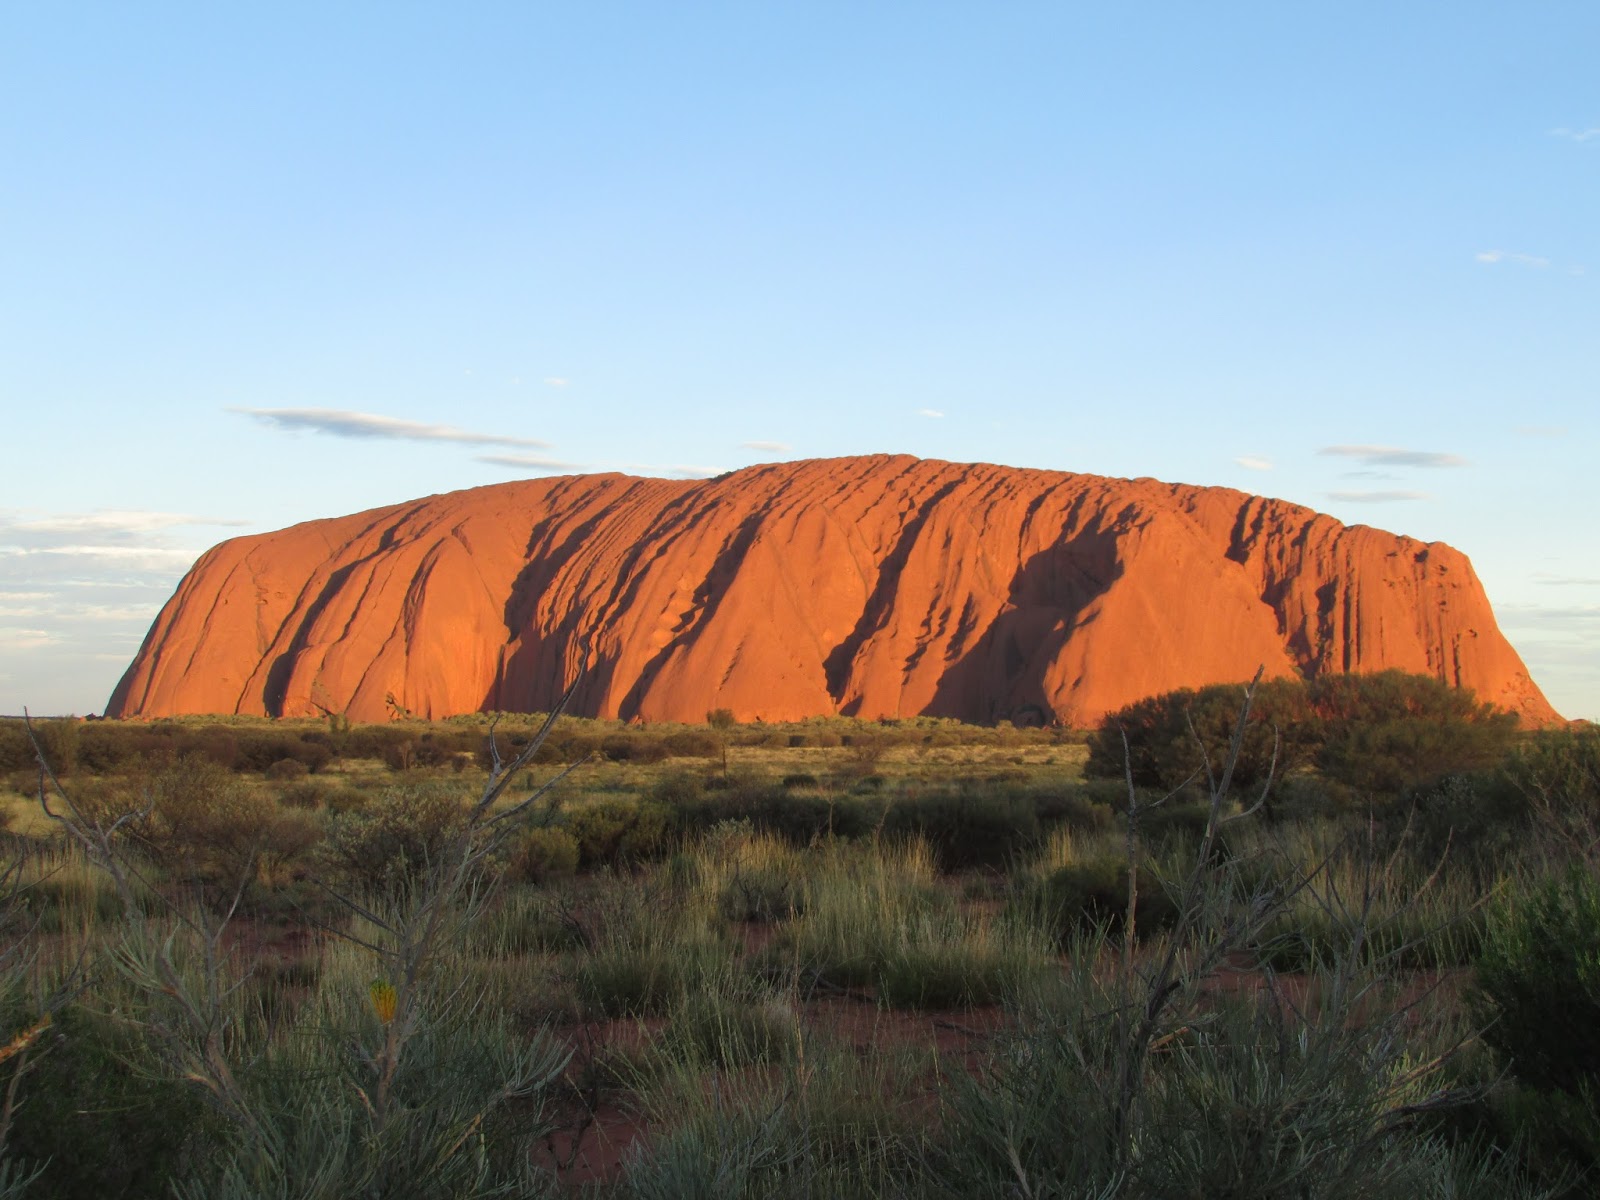
Hi everyone, if you follow me on Instagram then you may have seen a picture of myself at Uluru (or Ayers Rock), as I did a long road trip to get there the other week.
The Red Centre was a beautiful place, and the colours and aboriginal influences really got my creative juices flowing for some nail art!
As I'm travelling, I do find it really hard to juggle regular blog posts, especially in the outback as there is absolutely nothing, so wifi is a laughable ask to most people. Hopefully, I can reflect my trip to you though, as well as telling you a little bit about my journey along the way.

So lets get started

Coober Pedi

So to start my journey into the centre, we started in Adelaide and drove North. It took us 4 days to get to the middle, but we stopped at a little town called Coober Pedy for 2 nights to break things up. This is honestly one of the weirdest places I have ever been in my life, but I am so glad I went just for the stories to tell people. Coober Pedy is a mining town, and what you mine at Coober Pedy, is opals.
Opals are a precious stone that vary from clear to a gorgeous blue green colour, so I chose this polish called 'waves' by Sally Hansen, to give myself a Coober 'Pedi'.


 I wish I could take credit for the pun but it was all my boyfriend, however how someone hasn't set up a business in this place called that I do not know!

(Can I also just say that never did I ever think I would post a picture of my toes on the internet but alas, here we are. Be kind, I know they are not pretty feet but can anyone honestly say they have seen pretty feet?)

In Coober Pedy I also had the amazing experience of going to a kangaroo orphanage, where I met little baby Mona who lives in a handbag!


Aboriginal Art Nails


So another really cool thing I got to do at Uluru was take a dot painting workshop, where an aboriginal artist taught us a few basic symbols for us to create some work ourselves. It was so interesting to learn the symbols, as they can mean so many different things.
Whilst at the workshop, the lady taking the class did some art as well, and in the same space of time as us, she created the most beautiful blue water hole themed picture.


Just on this bit of nail art alone, I have done a little story about my trip here.
See if you can guess what I painted about!

Uluru Ombre


Now if you are anything like me and travel crazy, then you will have seen the mystical Uluru in real life or at least in pictures. I once saw a picture of it at different stages where it looked so different in colour, I knew I had to see it myself to believe it.

Although some say it is just a rock, (which yes, yes it is), it is a really spiritual place for the indigenous people of Australia, and you are actually not allowed to take pictures in some places as a sign of respect. Another thing the indigenous people ask, is that tourists DO NOT climb the rock, as they find it disrespectful, and also quite stupid. It is dangerous and it is causing environmental damage to the waterhole and rock itself.

There is currently a petition to try and get it stopped, so if you head that way, make sure you sign it!
One thing that we and the aboriginals can agree on though, is that the rock is really beautiful.

I saw the rock in the middle of the day, sunrise and also sunset, because it truly does look a different colour all the time. Sometimes it can be a really burnt orange colour, and others, it looks a beautiful purple.

Sunrise

Sunset

My favourite time was just at sunset though, as the sun ducked behind the clouds and gave the rock a pinky red hue, so I used this as the influence for my mani.


Obviously my travels take up a lot of my time currently, but I already have a few more nail art ideas in the works so hope to do a few more posts soon! 

Thanks for reading!

Wednesday, 13 January 2016

'Adore Me' Lingerie Inspired Makeup

Hello readers! Welcome to 2016! I thought I'd kick of the new year with a really exciting post! 

Jessica from New York based lingerie company 'Adore Me' has inspired me to create a winter inspired makeup look to compliment a sexy lingerie set of theirs. As some of you may know, my current travels in Australia mean I haven't been able to do any winter makeup looks, so I jumped at the opportunity to get a bit seasonal.

She sent me over some really lovely visuals of their gorgeous lingerie, but the set below really stood out to me. I love the detail on the back of the bra, as well as the floral burnt orange and black lace combo, and it really got my creative juices flowing for a makeup look.


Autumn is my favourite time of year, as I love the oranges and warm tones of the season. I wanted to create a makeup look to reflect this, so I came up with this smokey eye look, with a bit of orange zest.
I wanted the look to mainly focus on the eye, as eyes are the window to the soul, and focal point for seduction. Gold and orange brown tones work great for blue eyes, so that's another reason I chose this sultry look.


I started with my usual base makeup which is my Ren BB cream, and Rimmel 'Wake Me Up' concealer. I used my beauty blender to get a smooth finish and I didn't use a full coverage foundation as I wanted the skin to be light and dewy as its quite a heavy eye look. 


I then added some light contouring using the 'Hot Sienna' bronzer in my Estée Lauder palette.
Using the same bronzer, I created the orange/brown base for my eyelid. I then started to smoke around the orange with my Benefit smokey eye kit, carefully blending in the colours. 


At the end I lightly went over the orange to make it pop, and then added 'Nude Fresco' from the palette, for some gold tones in the corners of my eyes to make my eyes appear bigger and to make a gradual ombre. 


I finished of with some gold under the eye, a slick of Lancome Hypnose mascara, and a classic cat flick to define the whole look.


To keep the look warm, I added my nude Chanel lipstick called 'Adrienne', as this complimented the the eyes, but kept the focus firmly on them.

Coco Rouge shades from left to right: Adrienne, Coco, Roussy, Arthur and Emilienne.

As I'm a firm believer in using your nails as an accessory, there was no way I could resist doing some matching nail art to tie everything together. I used my H&M polish called "brickwork" and painted on some black half moons to add an extra touch.


New Year is a fantastic time to boost your confidence and plunge yourself into what the year has to offer. I highly recommend having a look at the adoreme.com website to find yourself something to make you feel empowered! Not only do 'Adore Me' do lingerie, but pajamas, everyday underwear and corsets so there is something for everyone. Their website also has a handy quiz, so you can find your perfect match in just a few questions!

Now we can safely say the Christmas dinner sluggish feeling has worn off, why not make yourself feel super sexy again?