Showing posts with label green. Show all posts

Tuesday, 18 October 2016

Trick or Treat Nails


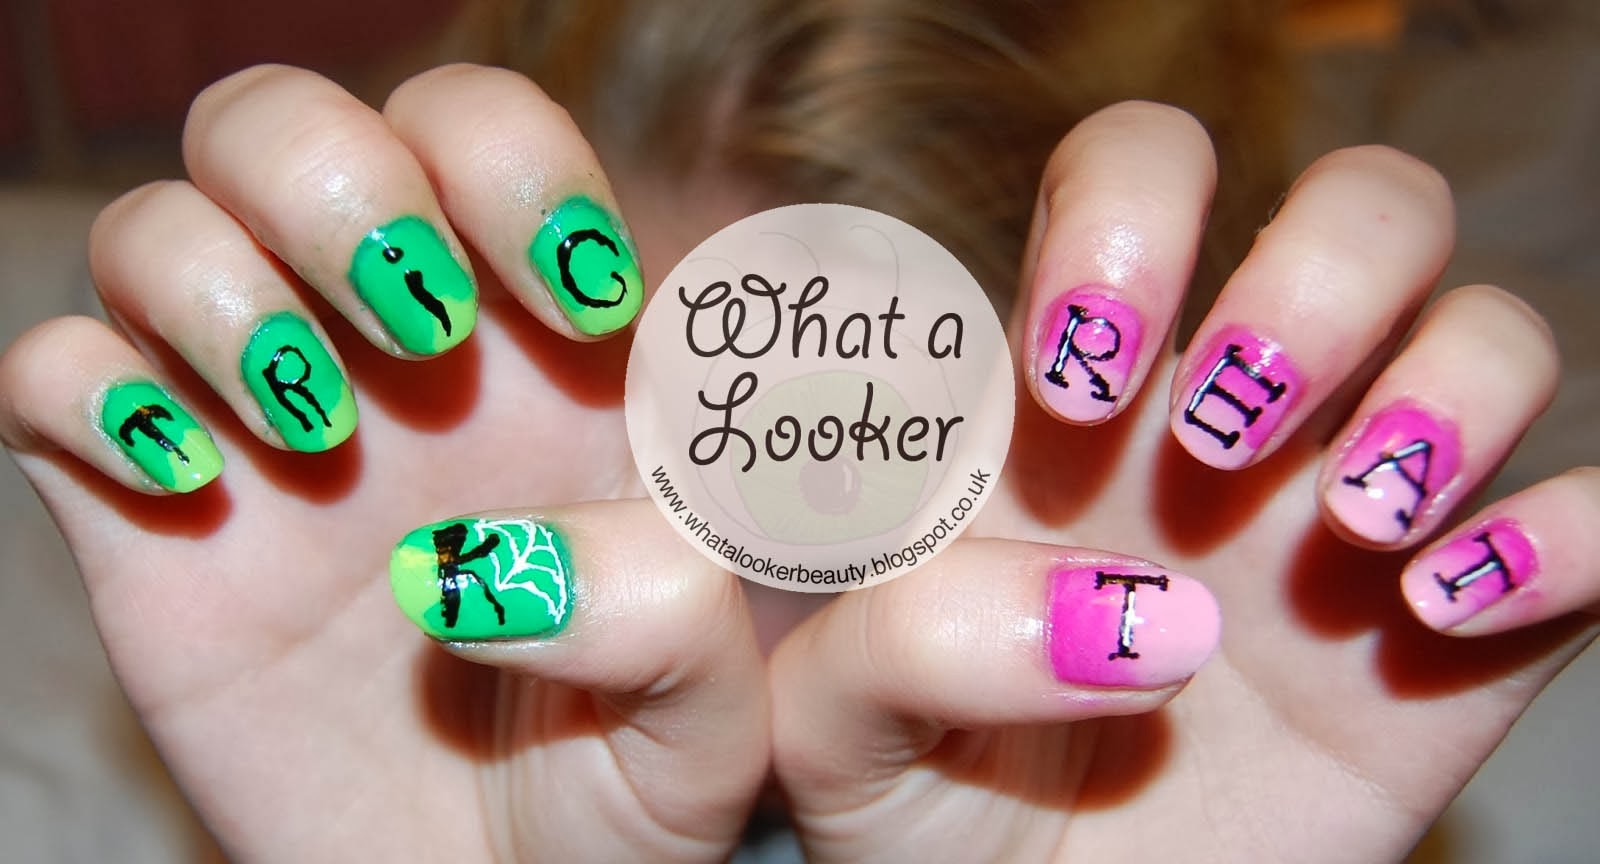
 Halloween is fast approaching! Usually I would dress up and go trick or treating with my younger sisters on Halloween and I still could not pass up the opportunity to do some trick or treat themed nails so here is what I came up with! 


To create this look I used two different shades of pink of green and used a sponge to get the ombre effect. The colours I used were Jessica 'Radioactive' (told you I would use this soon!) and 'Spring Green' by Barry M. For the pink shades I used Barry M colours. 'Strawberry' for the pale pink, and the other colour I don't know due to the sticker falling off! Its just a hot pink colour though. Sorry!

For the lettering and highlighting and little cobweb I used my trusty nail art pens.

Please excuse the green cuticles in these pictures, it is really quite tough to get off! I need to invest in some acetone.


I wanted to do more to them, like add sweets and eggs and ghosts etc. but I think it would have over crowded it too much, so maybe I'll save those for another time! I did however take the opportunity to pose my manicure with some halloween-y treats just for a change!


Let me know what you think!

Thursday, 12 June 2014

Brazil Nails

So the world cup is among us and us girls can either fight them or join them. I have done some world cup/ brazil nails VERY quickly this evening so excuse the quality. I used 'Radioactive' as my base, and then my nail art pens for details.


Saturday, 11 January 2014

Day 9: Pattern


So today I should be posting you my 'Day 11 nails: pastel blue'. However, I have still not posted my 'Day 9 nails: pattern'. I can only apologise for my lateness, I have been a bit ill so haven't been as speedy with my posting as I'd like. I have however done my pastel blue nails and they are on my instagram page NOW if you want an exclusive look! Please follow me on there as I tend to put my pictures on there first!
I'm really enjoying this nail art challenge, because the prompts are pushing me to do designs I only debated doing before, and pushing me to think outide of the box a little. This design in particuar made me reach for my Wah Nails book and search for this Python skin pattern which I only breezed over when I was reading it before.


This nail art was inspired purely by the nail polish I had on that day! After my previous post of the Mavala Metropolitan Collection, I left on the Emerald Gold colour. As I said in the post, a lot of the comments I got wearing this polish were "thats very mermaid-y", so I thought my pattern post should enchance the mermaid effect of the polish even more. And so here are my scale nails that look slightly marine/reptile. 


This design was also inspired by 'Brit Nails' who stamped black over a similar colour. I was going to use my stamper originally as I want to embrace it a bit more, but I didn't have a plate with the scale effect I wanted. I just freehanded these scales with my black Models Own nail art pen. 


Tuesday, 1 October 2013

Ciate: Emerald Collection


I have been so excited to show you the Ciate Emerald collection! I bought it a while ago for £25.00 online. The reason I bought it was because I have wanted to try the crushed velvet manicure so badly, but didn't want to buy just the kit on its own in case I didn't like it. When I saw the kit contained not only the crushed velvet, but caviar and glitter I knew it was the kit for me. Based on the lovely green emerald colour that is going to be the colour of 2013, I was really impressed with the kit, and want to buy all the kits individually now!


The kit contains everything you need, including a tray for all the mess, a clean up brush, and even a little funnel so you can decant the excess back into the bottle for no wastage! Little things like that really make something special to me so I was very impressed.


The actual emerald base colour supplied is called "ditch the heels", and is a full sized Ciate colour. I left one nail without any effects on so you could see it. It is a really lovely colour and I'd happily wear it alone.


None of the effects require a fiddly glue or anything, you just apply it to a wet second coat of the green base. For the caviar effect, you simply shake the bottle over the wet nail, and gently push in the balls to make them stick, and that's it! I love the colours of the beads. The gold, light and dark green give it a really festive feel, and I will certainly be sporting the collection over the Christmas season.


The glitter effect is achieved by dipping the wet second coat into the pot of glitter, and then wiping of the excess with the little brush. You can even afford to sweep over the whole nail to make the surface more flat. I am not 100% happy with the way mine turned out. I think I dipped my finger in a bit to hard, so I have a very uneven surface. I think less is more with this look, and it will last much longer without lots of layers, as I found they keep falling of due to there not being enough surface area for the glitter bits to cling onto! You also don't get such a good look at the pretty array of colours when it's heavily built up.


Finally, the velvet effect. As I bought the whole kit to try this effect I was really hoping I wouldn't be disappointed, and I really wasn't. Applying it was so easy, and the finished effect is exactly how I wanted it to be! It feels and looks exactly how you think it would, and I can't stop touching it. Due to this I think I have actually worn quite a bit of it away after a day, but the look is so versatile and it has really got the cogs in my head turning for future nail art ideas for example fluff, Christmas tree effect, grass??


The general staying power of these effects is actually really good. You can get your hand wet, then towel dry them and have no trouble, mine even stayed pretty tight after a hair wash which I thought would ruin it all. As I said about the glitter before, if you overload it then prepare to have a trail of green and gold glitter behind you. The velvet still feels very velvety after a day at work although the look is probably not as obvious as when I first did it. Quite a few of the caviar balls have fallen off, but after a day at work doing deliveries and opening boxes I would be very impressed if it had stayed on! Most of them are still in tact though and its the ones round the edge of the nail that have fallen off, and even where the balls have fallen off, they leave a little gold/silver imprint so it still looks like there is an effect on them.

Basically, if you want the nails for a certain occasion or party, then do the nails the day that you need them before because that is when they will look they're best.


 I absolutely love this kit, but I would love to know what you think about it? Is it perfect for the run up to the Christmas season or just too OTT?

Thursday, 1 August 2013

Floral Nail Art

A long time ago back in Febuary, I went to the Beauty Show in Excel Centre, London. Whilst there I purchased a 'Mo You' stamper set which I have not used enough! I decided to have a little practice the other day and think I'm slowly improving. I always feel like I'm slightly cheating when I use a stamper set, but actually they're quite professional, and create really neat detailed nail art. I chose quite a dainty floral pattern and used my MeMeMe polish in 'Pensive' which I got in my Glossybox and reviewed the other day. For the blue flower detailing, I used Nails Inc 'Baker Street' which is a really striking, cool colour. I still need a lot of practice but I will definitely persevere! This print came out a little patchy, but I quite like how it makes the delicate flower pattern look antique and vintage. 


Wednesday, 31 July 2013

Jessica Limited Edition Summer Colours


Pink Shockwaves
This colour somehow manages to look hot pink but almost pastel at the same time. It's a cool bubblegum colour and would look great worn on the beach.


Atomic Red
I absolutely love this red. It is like no other red I've seen before. It has hints of orange and coral and is a polish I will be saving up for.


Radioactive
Love her or hate her, Jessie J caused quite a trend in the nail world when she wore green nails on 'The Voice UK'. Ever since then green nail polish has become the in thing, and this polish certainly does not disappoint.  I think you'd have to be quite confident to wear it but it would definitely look amazing.


Yellow Lightning
Finally this bright yellow is another one to be worn with confidence. I personally have never worn yellow polish because I was always told yellow washed me out, but if I ever get a tan this summer, I will certainly be trying this one out as I think it would look so chic. This yellow just summaries summer for me!

Jessie J showing off her green nail polish, similar to 'Radioactive'