Wednesday 20 August 2014

Day 20: Tribal


Day 20. Tribal Nails. I love tribal nails but don't really do them enough which is something I want to change. I think they are fairly easy to do and you can create a different look every time. For these nails, I went on to Pinterest to get a colour scheme I liked and got them all ready. Unfortunately for me, all the nail art pens I wanted to use have dried up tips so I did all of this with the striper end which was really hard! Therefore, these have not come out as dainty or as neat as I wanted, but when pay day comes I will invest in some new pens and do some crazy amazing ones.

I used an pastel orange base then chose my green, pale pink and hot pink nail art pens for these patterns. I then used my black pen for outlining and detailing. My thumb nail is my favourite by far as it is the most dainty and the look I was trying to achieve. I didn't have a strict pattern at all I just made each nail up as I went along.


I promise I will do some better tribal nails soon!


Monday 18 August 2014

Day 17: French Tip


Sorry I am a day late with this post!


For day 17 of the Calfiornails nail art challenge, the prompt was french tip. I thought I would take the time to actually do something a bit more traditional as I never do anything like that... NAAAAT it's the summer I can't be that boring. I did actually do a traditional french manicure but I only did the white to make my neon colours pop more.


For this manicure, I used 'Barry M' Lychee for the base colour, and then used my model's own neon colours for the bright tips. I saw this manicure on Pinterest ages ago and thought it was understatedly cool.


Manicures with an interesting twist like this are perfect for summer. Sorry it is a short post!


Friday 15 August 2014

July Birchbox


This July Birchbox was a bit of a shocker to me. All the items that I thought I would like, I didn't, and the once I didn't think I would touch, have been the first things I look for when I need my cosmetics. So lets go ahead and see what happened.
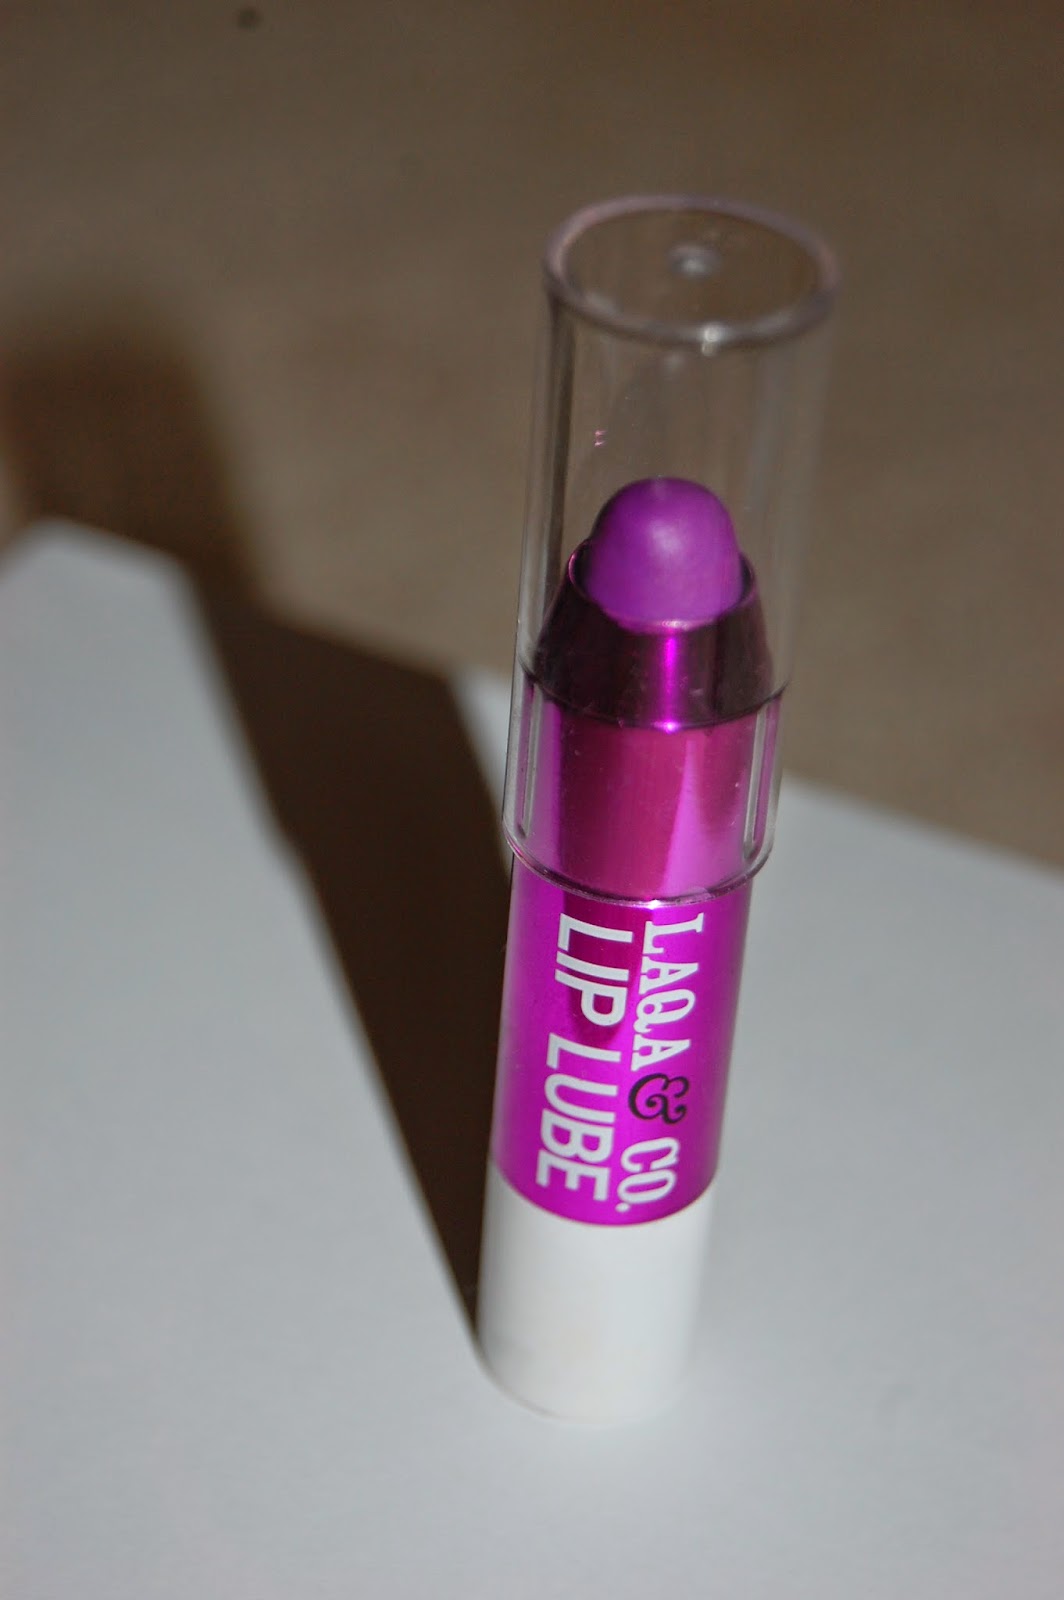
Laqa & Co Lip Lube


I have been wanting to try purple lipstick for while now so this was the perfect colour for me to recieve in my Birchbox. This Lip Lube is a lovely purple which can be built up into a darker shade for more of a 'wow'. It's really moisturising and lasts for a while before re applying. Was really happy with this product. It even featured in my 'Favourite lipsticks at the moment' post I did the other day. 

Gilchrist & Soames Bath Gel


Gilchrist and Soames are a brand I have heard of before, and have recieved a few bits from Birchbox too. This kelp extract mineral bath sounded like the height of luxury so I was excited to try it. I thought it would be the sort of bath that would make you feel really good after, like you'd had a spa break or something. Truth of the matter is, it didn't really do anything to my bath. I ran it in the warm water where it frothed a bit, but when I got in, in just vanished and the didn't do anything else. It didn't really smell or do anything to my senses so essentially I felt like I was just sitting in warm water. Bit disappointing! 

Three Wishes Body Butter


This was one item I thought I would really hate. Lavender is really not a smell I can stand since working in natural beauty products, where pretty much everything is scented with it. I was a bit dubious about putting this on my skin but I am so glad I gave it a chance! This doesn't really smell like lavender at all, more like a powdery night time baby lotion that is so sweet and lovely. Even my boyfriend commented on the smell and how nice it was. It is a really calming smell so I like to put it on before bed. The added bonus of this product is that it is all naturally sourced so has no chemicals or parabens! I am actually considering purchasing this item as it is so lightweight and leaves the skin feeling so lovely, pretty good going for a product I thought I'd hate!

Weleda Shampoo


This was one of the brands I had heard of before, and it is a all natural hair care brand. I have tried a lot of natural haircare so understand that it isn't a conventional hair wash as there is no foam and you have to work a bit harder to get that 'froth'. Adding more water to natural shampoos helps them work so much better, but with this one no matter how much I added it just didn't work. I tried using it twice in one wash as that can often help but I just didn't get anything from it which was shame.

Balance Me Eye Cream


This was the product that Birchbox were really excited about putting into their boxes. For me, eye creams are the sort of this you can't really tell if they are good or bad. Obviously if it gives you a horrendous reaction and streaming eyes persist usage, but I think they are the sort of products you will only see the benefits of over time when you start to get a bit older and things like crows feet become a concern. Obviously the later in life your crows feet come then the better the eye cream you've been using, but who sticks to just the one?! I have never been a user of eye cream until recently, and as far as this one goes, it does feel nice. Personally I prefer more of a gel consistency as I feel creams are a bit more heavy duty for my age, but it did feel nice and hydrating, but tha'ts all I have to say on it really!  It has won the Red Green beauty award, and is called a wonder cream too. As a company, Balance Me are a natural brand, made by three British sisters whose brand has had involvement with Topshop. 

Vita Coco natural Coconut Water lemonade Flavour


I always love the extra little lifestyle items Birchbox put in their boxes, they are always really thought out and sometimes contain food and drinks such as this, which I love to stuff my face on. This month was a coconut water which I have always found to be pretty vile tasting. The original one with no added flavour at all has a pretty furry after taste I just can't get used too. Coconut water is really good for you, and more hydrating that actual water. When I first drank one I thought it would taste coconut-y and sweet but it really didn't. Safe to say I was a little dubious about having a sip of this, even though I knew it was going to be slightly lemon flavoured. I say slightly lemon flavoured but it is actually very strong. It tastes a bit like undiluted lemon squash, but you can still get a hint of the sweetness of the coconut. Believe it or not this is actually a good experience as for me, I really can't bear the taste of it in its original form, and this one is quite drinkable. As it is mega healthy and  I would probably try and drink it, and this one is certainly the best flavour I have had so far. contains no fat, so is perfect as a after dinner sweetener for before you go on holiday.


Thursday 14 August 2014

Day 14: Pineapple nails


Hi Guys! It is that time again where I have decided to embark on a nail art challenge to spice up my nail art and make myself try stuff I've been meaning to do! I only saw this the other day so I am coming into it late, but some of the earlier prompts I do want to try so I will be catching up. I have also now booked a holiday at the end of the month too so some of the later ones may not be done on time either, but we will get to that palava when it comes to it!

ANYWAY I shall stop rambling and talk to you about today's prompts, Pineapples. Much like the melon nails I did the other day (which I am totally passing off as the 'Tropical' prompt), there are lots of different patterns out there in the nail art world, but I saw some cute little ones which I took a real liking too.


These didn't come out as well as I wanted them too, but I think you can tell that they're pineapples?! I used nail art brushes which I don't usually do and I must say I find them quite tricky. Nail art pens are good but limited in colours, so when I needed a dark brown for the details and outline, I had to use a brush as I don't think a brown nail art pen would sell all that well!

My other criticism of these nails is the base colour I used. I used a colour club polish which I got in my Birchbox (review coming soon) and I thought it had a deep Mediterranean feel to it, almost like a green sea colour. I do like the colour but I think it may have been a shade too dark for this design.


Anyway, I don't totally hate these nails, and smile when I look down at my fruity little fingers! Let me know what you think :)

Monday 11 August 2014

Melon Madness

This time of year, I would say melon nail art is one of the most popular designs. Melons, and other fruit for that matter, just scream summer, and I have seen so many amazing variations on the melon design. Instagram is just a HUB of amazing nail art from people around the world. It is here that I see most of the designs I want to recreate, and how I find other nail enthusiasts to follow. Whenever I see a design I want to recreate, I give it a quick screen shot and save it for later.

The pictures you will see in this post are pictures that I have done exactly that, and because there were so many cool melon designs I wanted to try, I decided to do them all at once. 


Firstly, my thumb melon was inspired by @thesammersaurus (usually goes by nailasauraus) who was one of the first nail bloggers I found on the internet and I was absolutely gobsmacked at her nail art. She is absolutely flawless and is always so neat and tidy. She really opened my eyes to the standard of nail art you have to be at if you want to compete with the big dogs. She has a lot of influence in the nail art world, and is involved in a lot of nail art groups who set challenges for people to join in on which has a nice community feel.


This really simple melon design is perfect and easy to replicate. I painted a white base, outlines the edge of the nail in green, and then used the ruffian technique to get the white peeking out from the pink.


Next is @ciaomanhattan2012 who is a an American nail artist I came across. I don't know as much about this artist as I have recently discovered her, but I love these little melon slices. Obviously I have done mine on a white base but I think the clear background looks really effective. I think these are my favourite ones.

To recreate this, I started with a white base and then drew on pink triangles. I then drew on the green skin down one edge and added seeds all done with nail art pens.


I just realised I wasn't actually following the original artist of this ombre melon design as I found it via @nailartmag page. I am now following @nailstorming and her nail art is amazing!! She describes herself as a nail wiazard and I have to agree. Her page is full of video tutorials and flawless nail art. 


This was the trickiest to recreate as ombre is always a bit touch and go! I painted a white base then painted a green white and pink lines next to each other on foil. With my sponge I then dabbed on the nail. When dry I added black seeds with a nail art pen. Mine aren't as neat as hers but this is certainly close second to being my favourite.


I found these nails on @simplyspoiledbeauty done by nail artist @featherclips. She is a undiscovered nail artist so I highly suggest giving her a follow. She is very neat and does a lot of nail art challenges which I love!


I have not quite nailed these as well as @featherclips as my melons don't overlap like hers which looks much better. To do these nails, I painted a pink base and then used my hot pink to give more dimension. I then drew on the green skin and outlined the melons in white. Finally I added on the black seeds.


Lastly, I have recreated some melon nails I did a while ago. Unfortunately I don't have a picture anymore (I must have deleted it of my blog from embarrassment!) but I did these exact nails when I first started doing nail art at university, and they were pretty rubbish. So I have recreated these simple little melons for my little finger.


All the colours and  I used for these nails are pictured below 

(Jessica Radioactive, mixed nail art pens by Models Own, White by Barry M, and the pink O.P.I colour I received in my Birchbox from the Brazil collection)


Tuesday 5 August 2014

Emma Hardie Cleanser

I'm going to go right out there and say it... but this is my favourite cleanser I think I have ever tried. Usually when a product is coming to the end, I am always thinking what I can try next, and this little sample size of Emma Hardie's Moringa Cleansing balm, has just not been around long enough for me.


Up until very recently, the idea of a cleansing balm made me sick to my stomach. A waxy oily balm all over my face and eyes sounded vile to me. Since trying a cleansing balm, I am now an addict, and would say it is my favourite consistency of cleanser. I like having the soft balmy feel afterwards, and I like feeling like every scrap of my makeup has been removed.

This Emma Hardie cleanser is said to rival the number one cleansing balm by Eve Lom, (small review at the end of this post here) which Vogue has said is the best cleanser in the world. I'm not one to argue with a top fashion magazine, but I think this just maybe better.


I do love the Eve Lom cleanser, but my only problem with it, is the clinical smell it has. It is also quite pricey at £55.00 for 100ml. Emma Hardie's cleanser is only £36.00 for the same amount, and this balm is made from all natural ingredients, and that really reflects in the beautiful smell it has. It's main ingredients are Grape, Almond, Orange and Bergamot. I smells almost like Neroli, the orange flower, which is undoubtedly my favourite smell at the moment. It melts on the skin and sweeps away all traces of makeup. 


The other winning counterpart to this product for me are the cloths. The full size cleanser comes with a cloth, or you can buy three in a pack like I have done. You can see the packaging of the products as well from the picture.


Emma Hardie has created this dual sided cloth, as the muslin material is traditional for cleansing balms, and is great at removing stubborn eye makeup. However on the other side is a micro fibre flannel, which goes deep down into the pores to really remove all grime, and give the skin a good polish. It is gentle enough to be used everyday, and you really see every trace of makeup come of on the cloth. It can also be run under a tap to remove the grime, and the cloth looks basically clean again. Obviously after a while they do need a quick go in the wash, but they are a good size and take a lot of usage before it needs to be washed.

The Emma Hardie 'way' of cleansing is not to scrub at your face, but to gently sweep down the natural lines in your face, so down each cheekbone, down the nose, and just general downward motions to really give yourself a mini facial.

The combination of this cloth and the lovely smooth balm makes me look forward to my evening cleanse. The balm can also be used as a mask for 10 mins, but I didn't have enough in my little sample size to try it! She also has a foaming face wash cleanser which is great for people on the go, or for morning cleanses. The two can also be added together to make a mega cleanse mask. I hope to try more products from the Emma Hardie range, so keep your eyes peeled!